Rename OneDrive Photos on Web, No Downloading Involved
OneDrive is a web-based data platform that allows its users to upload documents, images, video and audio files, etc. With the passage of time, OneDrive can become cluttered with photos that share very similar names. This makes it not only quite difficult to locate the original file but it also leads to time wastage and reduced productivity.
In such cases, renaming files becomes mandatory and with the introduction of Cloud File Renamer, the process is as simple as it can get.
Cloud File Renamer
This is a service based on the web that enables the user to rename all kinds of files located on select cloud drives. It employs 256-bit encryption to ensure that the user’s personal information remains protected and makes use of the official cloud drive APIs to guarantee data safety and security throughout the process.
Renaming OneDrive’s photos with Cloud File Renamer is very simple, and easy. Simply follow the steps mentioned below.
Step 1: Visit the Cloud File Renamer website
The first step of the process requires visiting the Cloud File Renamer website and creating an account (totally free). If you already have a Gmail or Microsoft account, simply tap on the respective option to sign-in directly, else you can go for the Create an Account option.
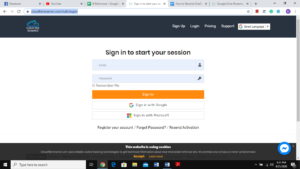
Login page
Step 2: Log in to OneDrive
Head over to the App area, where you will see the OneDrive tab selected by default. Click the Add New Drive button and Insert your OneDrive account credentials. CFR will now ask for permission to acquire data through the OneDrive official API. Once you grant the permission, it will momentarily load up your OneDrive data.
Step 3: Load the Folder(s)
You will notice your OneDrive folders load up in the panel just below the Add New Drive button. Choose the folder(s) that contain the photos you want to rename and then Tap the Load Files button at the bottom. Cloud File Renamer will now load the files very quickly.
Step 4: Select Files
The list of files displayed will include files with their size and path. You can also individually select files you wish to rename.
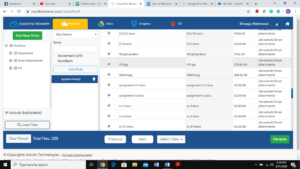
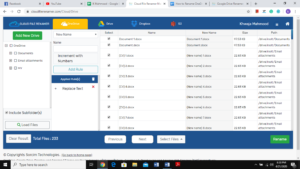
Step 5: Choose the Renaming Rules
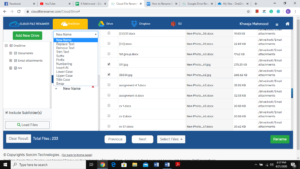
Choose the renaming rule of your choice
Now click the drop-down menu that says New Name. Click the relevant rule, select the options that are relevant, enter the text (except Upper Case, Lower Case, and Title case rules) and click Add Rule. You will notice the rule add up in the section of Applied Rules. You can set up as many renaming rules as you want simultaneously. You can check the preview of the file names through the column that contains files with New Names. If you desire any changes, simply hit the cross in front of the rule’s name in the section of applied rules, and you can start over again.
Step 6: Last step
Now that you are all set, simply click Rename, and Cloud File Renamer will instantly start the rename job.