How to Bypass OneDrive Personal Vault Maximum 3 Files Limit for the Free Plan?
OneDrive Personal Vault is a security feature that offers robust privacy and data security. It encrypts both the data in transit and the uploaded files.
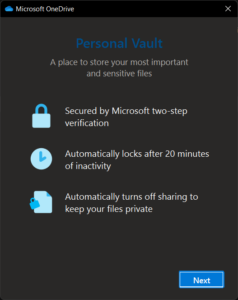
Personal Vault is a protected area that requires two-step authentication every time the user wants to access any files inside it. You can verify your identity using various methods such as a PIN, fingerprint, email, SMS, or simply your face. The Personal Vault automatically locks itself after 20 minutes of user inactivity. This prevents unauthorized access to critical files even if someone else gets access to your desktop computer, or your laptop gets stolen.
Rename OneDrive Cloud Files Online
Use Cloud File Renamer by Sorcim. CFR Uses official Cloud APIs
How to Access Files in your OneDrive Vault?
There are two ways by which you can access the files in your OneDrive Vault.
You can access the files in your OneDrive Vault either from the OneDrive website, or straight from your machine that has the OneDrive client app installed.
- Logging-in to your OneDrive Account
The easiest method is to sign in to your Microsoft OneDrive account.
- Sign in to your OneDrive account.
- In the My Files section, click on the Personal Vault icon.
- Select a method to verify your identity. For example: Use a verification code from my mobile app.
- According to your preferred verification method, follow the on-screen procedure (for example, enter the OTP from your Google Authenticator app) and your files will be accessible straight away.
- Using the OneDrive Sync Client App
Another method to access the OneDrive Vault contents is to sign into OneDrive using the sync client app. If you’re using Windows 8.1/ 10/ 11, OneDrive is preinstalled. You don’t need to download it separately.
Note: The official support for the OneDrive app for Windows 7/ 8/ 8.1 has ended since January 1, 2022. However, your files will continue to sync until March 1, 2022.
Using the Microsoft OneDrive Vault through the sync app
Steps:
- Open the OneDrive app using the system tray icon.
- Enter your OneDrive login credentials and verify your identity, if required.
- Wait for a moment as your files are synced offline. It may take some time depending on the size, number of your files and Internet speed.
- Once your files have been successfully synced, open File Explorer and click on the OneDrive icon on the left-hand side panel of your screen.
- Double-click on the Personal Vault folder.
- If this is the first time, Personal Vault will display an introductory window. Click on Next > Allow.
- Verify your identity by choosing your desired method of verification.
- Now, the files in your OneDrive Vault will be displayed. You can add new files by simply dragging them over to the OneDrive Vault folder. Similarly, you can create new files inside your vault as well.
How to Bypass OneDrive Personal Vault Maximum 3 Files Limit on Free Plan?
Now, let’s get back to the topic.
As a free user, you’re restricted to only 3 files inside the Personal Vault. Thankfully, there are easy ways to bypass this restriction and store as many files as you want — all without paying a single penny.
Yes, you read that right. The idea is to compress your files into a single compressed Zip file and store that Zip file inside the Vault. This way, you can use the Personal Vault to store hundreds of files in your desired compressed file format (such as .zip, .rar, .7z, just to name a few).
Applying the settings for the compressed file
Steps:
- Open up File Explorer.
- Go to the folder that contains multiple files you want to move to the Personal Vault.
- Compress these files using one of the following methods:
- If you’re using Windows 11, simply select your files. Click on the See more icon on the toolbar, followed by Compress to ZIP File. Your Zip file will be automatically created. Specify a name for your new Zip file.
- If you’re using an earlier version of Windows, download and install 7 Zip File Manager. Go to the folder that contains the files you want to compress. Select the files, right-click on your selection and choose the Add to archive option. (If the menu options are cascading in nature; you’ll find the Add to archive option under the 7-Zip menu option). Specify a name for the archive and then click on OK.
- Drag and drop your Zip file into the Personal Vault folder.
Bonus Tip
For added security, you may password-protect and encrypt the Zip file. This will provide an additional third layer of protection besides the Personal Vault authentication already offered.
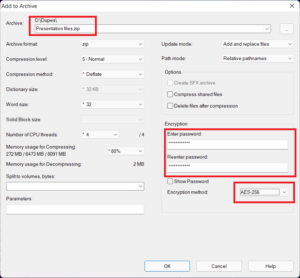
To password-protect your Zip file using 7-Zip File Manager, type in your password in the Add to Archive dialog. Verify your password, select your desired Encryption Level (for example, AES-256) and then click on OK.
Unfortunately, there is no way to password-protect a Zip file using the in-house Compress to ZIP File feature in Windows 11.